![]()
![]()
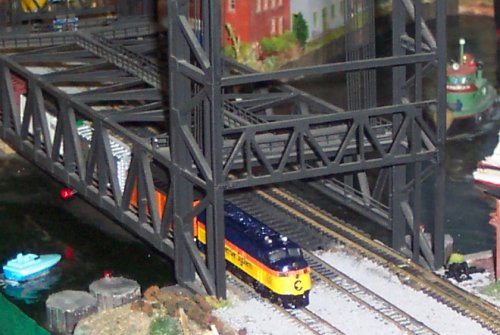
My layout is designed as a point-to-point pike, with several points of interest at both ends and in the middle. In its current state, continuous running is not an option, as track quickly terminates at a wall.
My layout is designed to be modular, using 1"x4"s and spanning a 2'x4' distance. I have a short (6") or less section of un-secured track between modules to protect the rails when moving. The module sections are held securely together by 2-3 1/2" dowel rods through the ends of both modules, and 2" screws. The legs are 2"x2"x4's, and are braced by a second level for storage. Wiring on modules and across them all connect to 8-position terminal strips. It's easier to temporarily route power using a terminal strip than to try to run a new lead.
I designed the pike before I started construction, using Atlas Right-Track Software, which allowed for changes to be made to the design before construction. (I may still make more changes to the design.) I recommend that everyone try designing their layout before they build. Some of my un-designed track plans weren't much more than a loop or two of track on a 4'x6' surface. That same 24 square foot of space could have been used to make the track plan much more interesting and the track could have gone farther.
When I was about 7, I got a train set. My first layout started with the usual sheet of plywood, but my sheet was 4' x 4 1/2', not 4' x 8' as many people use. This was for my Bachmann Train Set. I had one of their standard series diesels (they don't run as nice as the more expensive ones, but they will stand up to abuse...great for young kids.), a few cars, and a caboose. One of the hopper cars that came with the set has been heavily weathered and will be put into everyday use once I get new trucks and Kadee type couplers for it.
The best part of my layout was that it was on 1" diameter wheels so it could be rolled out from under my bed when I wanted to play with it. That was a great idea because of the lack of space in my room.
Several years later, it eventually moved to the bottom bunk of a bunk bed, and was expanded out to 4x6. I never had a really good track plan, but once I had a run-around track.
We moved, and so did the layout. Instead of using the bottom bunk, I mounted 2x4s to support the 4x6 layout, and added more material. However, since the layout was against a wall, it was hard to get to the other side of the layout... If you're building a model railroad, I recommend against having a depth on anything against the wall more than 24-30 inches.
During the time of this form of the layout, I discovered Computer Aided Drafting (CAD). I redesigned my layout, and never got the materials to properly rebuild it to the design. This was due in part to another move...
Since the layout was mounted on 2x4s, it was extremely heavy and bulky, but it survived the move better than just being a sheet of plywood. Thanks to the magic of CAD*, I redesigned my layout to fit the space, and settled on a modular design using 2 ft by 4 ft modules. Also thanks to CAD, I can and have made major design changes before building. This is thus to the point where my layout is now.
*The CAD programs I used were XTrakCAD (now open source) and Atlas Right Track Software (freeware).